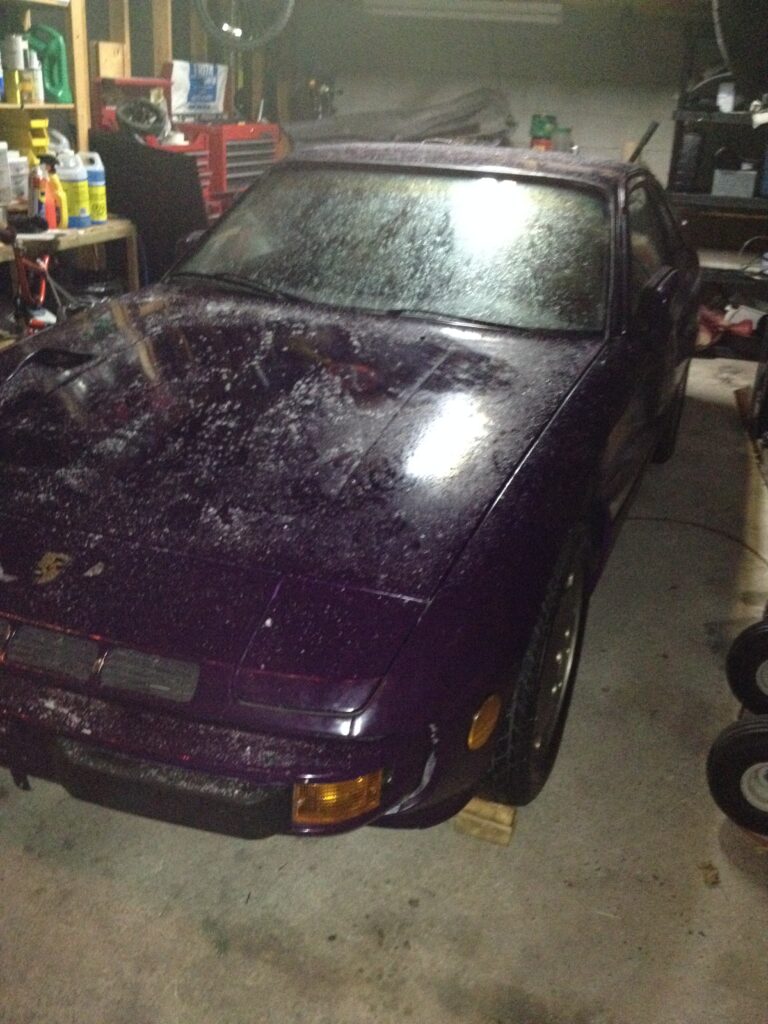
November 2014 – I wasn’t really looking for another project but I had been toying with the idea of one day picking up a front engine rear wheel drive vehicle like the old Ford Escort Mk II I used to have in the UK. I have some RSS feeds set up and one of them brought a posting for a 1980 Porsche 924 Turbo to my attention. The good parts are that it is front engine rear wheel drive with a manual gearbox, it’s in decent shape and should have the awesome Porsche handling. On the down side, it has been off the road for 17 years, it doesn’t run (no power to the fuel pumps), there are lots of electrical accessories not working, and it’s purple!
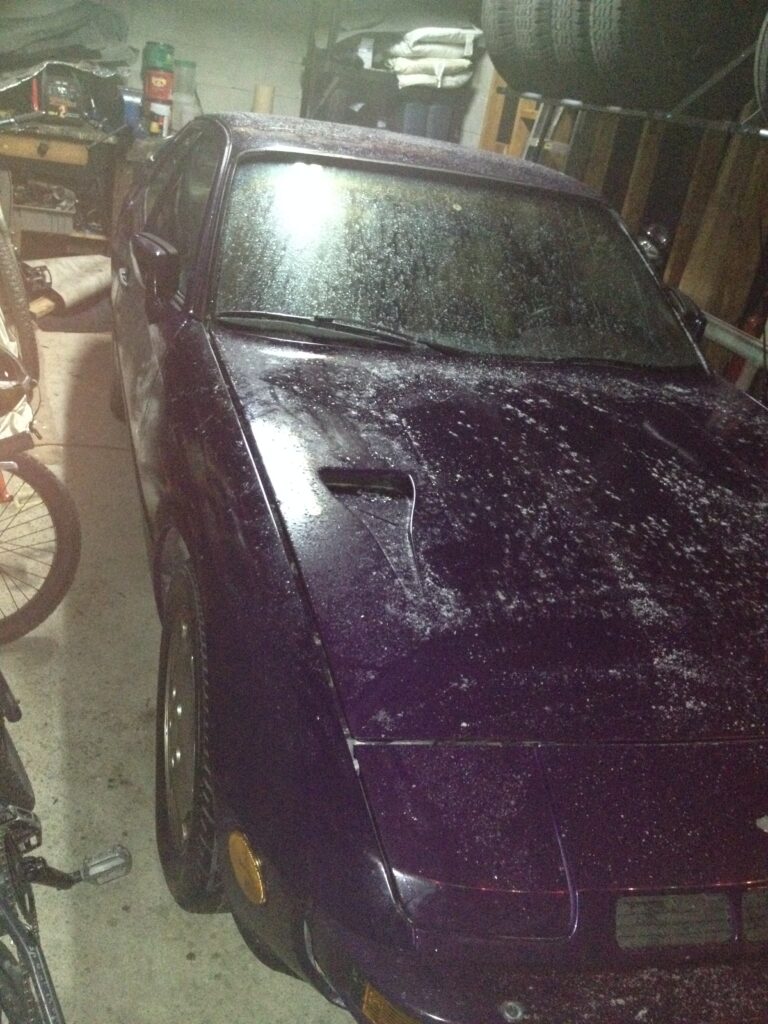
I apologise for these bad pictures, it is winter so I’ll have to wait for spring to update with some better ones.
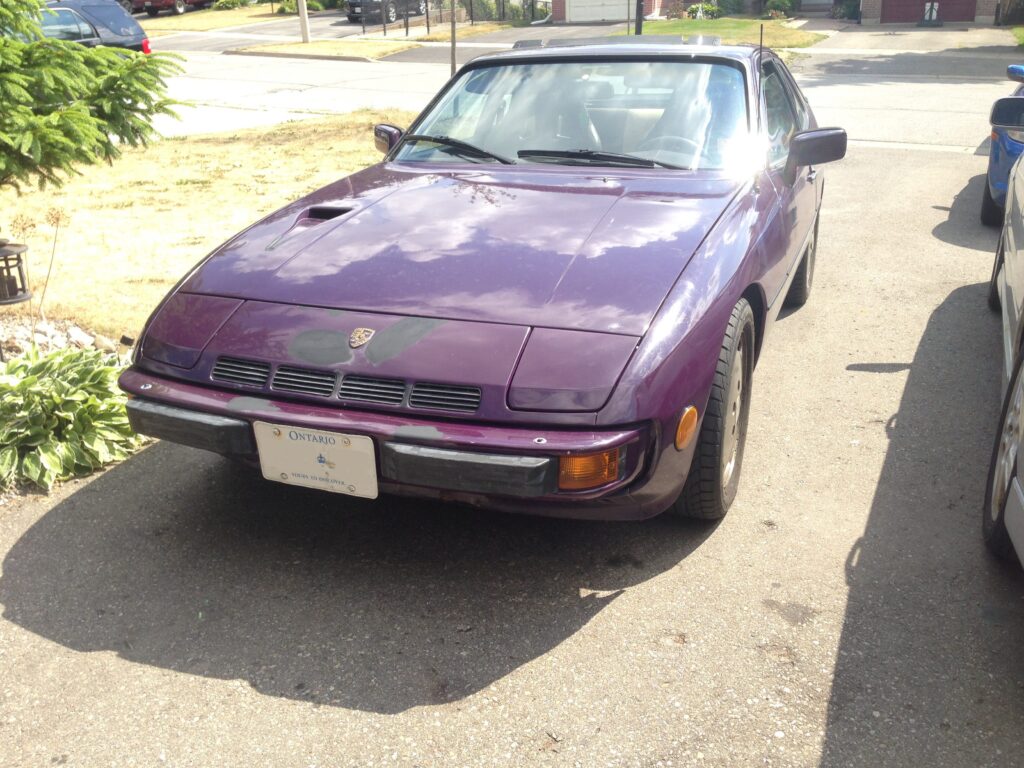
And at long last, here are some slightly better pics,
To Do List
Check slight hesitation at about 4500rpm when accelerating hard
Find and fix oil leak from around turbo – I noticed the other day that the oil seems to be coming out of the throttle body seal and the intake joints, both were loose. Not sure why so much oil is getting in the intake, could be turbo seals. I’m sure the oil pressure must be fairly high since I’m running 20W50 oil and the temperature has been around 0C lately, that won’t help.
New shock absorbers all round
New control arm bushings
Check/paint rear calipers
Remove dashboard
Remove remaining AC stuff in PS footwell
Fix instrument lights
Hardly any air coming from defrost vents, fix/replace blower motor – no power getting to blower motor, blower motor does not spin when connected directly to battery
Paint A arms and heat shields
DS electric mirror not functioning and glass stained – stain covered with blind spot mirror
Driver’s seat cover repair
Completed
Q1 2021
Fix coolant leak from around water pump – found a way to pressurize the coolant system and found leaks around the thermostat as well as the pump. Made a new water pump gasket using gasket paper from Rick (cheers!) and got a new thermostat seal from CarQuest with a piece of 1″ hose. Cannot get the hose in place without it kinking so will have to order the proper Porsche part, ugh!
Q1 2020
Changed the oil to 10w40 semi synthetic to see if that helps with the oil in the intake.
I noticed a bit of an exhaust smell when out testing the other day, then the exhaust got really loud! Found that the exhaust mount at the turbo had completely broken off, it’s probably been failing for a while since I had a few muffler hangers that broke. Josh welded it up for me and we drained the oil while we had it jacked up.
New tires for front Boxster rims – got 2 Falken tires fitted on the front
Fix the bloody idle hunting / low idle – Had to move the Porker out of the garage so Josh could install new brakes on the Golf. It started fine but then when it had been left on the drive a little while and we had to pop to CT it didn’t want to start again! Had to disconnect the cold start injector suggesting that it is still too rich at idle, so I backed off the idle mixture screw another 1/8 turn ccw.
Repair/replace hood latch release lever – Picked up a new push/pull cable from CT to replace the old one. Took a while to thread it through the guide holes and had to cut it down by about 1ft but got it done in just over an hour, works great 🙂
Fix the bloody idle hunting or low idle now! – Leaning towards this being ANOTHER dodgy fuel pump
Bought another Walbro 255L external fuel pump new old stock, installed it and it was EXACTLY the same!! So I took it off again, emptied the gas and sprayed a load of WD40 in the inlet and put the caps back in, and put the old one back on.
Then digging around on the internet I found a post talking about an idle mixture adjust screw on the fuel distributor and suggesting that a rich condition at idle sometimes causes idle hunting!! I had been dubious about messing with the mixture since you’re supposed to set it using a gas analyzer and I didn’t realize that there was there was an adjustment for just idle. It all makes sense now, having to disconnect the cold start injector to get it to start sometimes, the idle hunting, the black spark plugs, and the running fine off idle. So I found the screw and adjusted it and the revs immediately climbed from 500rpm up to about 1000rpm. i was seriously tempted to go for a test run but there’s snow all over and the front tires are almost bald so it will have to wait for a while but I’m sure that this must have got it!!
Check instrument wiring and grounds – the ground strap that goes from the alternator to the intake was frayed so I replaced it. In the process, I found a couple of ground wires nearby that were cracked and corroded so I replaced them as well. It turns out that one of the cracked wires was for the oil pressure gauge so that is reading properly now, nice and steady and not jumping around all over the place, sweet.
October 2019
Still struggling with this idle hunting, very strange – please let me know if you have any theories or ideas of something to try. Tried disassembling and cleaning the WUR, worked for a day and then hunting started again. Tried again and this time the hunting was worse and then it would cut out if you booted it in second gear, definitely doing something though. Tried one last time and blew out the little passages with the air gun … to be tested.
Starting is still problematic and I have to disconnect the cold start valve sometimes – removed the cold start valve and blew it out while applying 12V to open it.
Got some spacers made up by Josh and finally got my longer wheel studs so I could install the Boxster rims
Cleaned Idle Air Control Valve and fixed bad wire on connector
Installed new LED side marker bulbs in the front
Muffler hanger broke AGAIN! Used thicker plate to repair, hopefully the Mk3 will hold up
September 2019
Installed brand new fuel filters, both in the engine bay and the in line filter.
Removed and cleaned the cold start valve, it was a bit coked up.
Drained gas tank again and got more crap out with the brush, cleaned the in line filter and got more crap out than I hoped but it cured the slight idle hunting I was getting.
Figured out how to start it when it’s acting up, if I disconnect the cold start valve it fires up, the revs climb slower than normal but it does actually start. I suspect that the cold start valve is pouring fuel in rather than spraying, if it doesn’t sort itself out I’ll take it out and clean or replace it.
In line filter at tank is not getting as much dirt in it now. Drove to work for 3 days but then it wouldn’t start again ugh, started fine the next day but removed the metallic filter at the front and cleaned a load of crap out of that
Drain gas tank and get all the crap out, or replace – drained twice and brushed out a load of gunk and tried blowing out with air
Keep having idle hunting and starting issues. Cleaned the inline fuel filter several times and it seemed to be running ok so I drove it to work on Monday but it wouldn’t start in the afternoon so had to call CAA for a tow!! Not impressed! Got it started at home but the fuel pump was very quiet. Checked that it was getting power and it was good – now I’m wondering if the fuel pump is going bad, I have an in-tank pump from the RX8 that I might see if I can install.
Had another look at the horn, checked functionality by connecting direct to 12V, they work. Hooked up a check light and found no power getting to the horns, basically re-discovered that the horn fuse (#1) has a bad connection! I should have looked on here!
Gas is seeping from the bottom of the tank again, need new rubber seal – drained the gas and found the old seal was trashed, turned to powder trying to get it out, the guy at CarQuest gave me an O ring that fits!
Check nut on engine mount again – seems fine
Top up coolant – at max fill line
Check oil pressure sender – has 2 wires on it, one for gauge and one for light, the light wire is soldered on, the gauge appears to have a bad connection somewhere
Took quite a few turns on the boost controller before it started having any effect on the boost. On the last run, the boost gauge signal line blew off the T adapter, the line to the boost controller also got knocked off while replacing the gauge line. Put a tie wrap on the gauge line, think I should see about getting a 1/4″ T with adapter to 1/8″. With the boost turned up a bit, the car drives much better. Stock was about 6 psi boost, getting up to 7 or 8 psi now.
Had another look at the blower motor, no power seems to be getting to the motor and the motor does not spin even when connected directly to the battery. Could not remove the flap, seems like it’s going to break.
With the boost controller backed right off, we’re seeing about 6 or 7 psi of boost, dialled the controller in 1.5 turns.
Fixed a kink in the boost gauge signal line that was causing no boost reading
Moved the boost gauge wire to the radio so that it is lit up when the ignition is on – it is tinted so hard to see even in daylight.
Connected the boost gauge light wire to the oil pressure gauge signal wire so that the boost gauge is lit when the ignition is on but the oil pressure gauge went maxxed out??
Fix coolant leak – the bolt that was holding the wastegate vacuum line was also clamping a component to the head, I had not replaced the bolt when removing the vacuum line
Install new rear brake rotors
Install boost gauge ($45) and controller (used $20) – removed clock, moved oil pressure over
The head gasket failed!! On the way home from work it was boosting intermittently again. At an opportunity to open it up a bit, it boosted nice for a while before suddenly BLAMO – a big cloud of white smoke. Had to get towed home – must join CAA again since Fred’s Towing stung me $130 to tow me less than 5K!!
Removed the head and sure enough, the gasket was toast. Also there were a couple of gouges in the gasket face of the head, Dave J says that this is probably the cause of the head gasket failing – will have to get it skimmed.
Found some marks on the cylinder walls that look like scoring but on closer inspection, I couldn’t feel anything to the touch and could not find any signs of debris (there’s a bit of oil in the pic that looks like debris) so I think they will be fine as they are.
You can also see valve marks in the top of the piston, must have happened some time in the past – my timing belt was in tact.
Had a good look at the camshaft and followers and found that they were badly worn. Took everything over to the fantastic Beatty and Woods in Mississauga who suggested replacing the camshaft and followers rather than re-grinding. The did a great job of skimming the head and while they had it, they did a leak check on the valves that came in within tolerance. Also picked up a head gasket set from Precision Auto, it’s for a NA 924 but the parts diagram gives the same part number for the Turbo.
Struggled to find exhaust studs; CarQuest came through with some in the end for under a buck each – nice.
Found a used camshaft in UK at porsche924.co.uk, only 8000 miles on it. No followers but I contacted the guy and he had a spare set that he agreed to sell me with the camshaft. Got a great deal with reasonable shipping and the guy did a fantastic job of packing it all so it arrived safe. Had to do a bit of fiddling around to get the clearances in and a couple of valves are close to the limits of adjustment.
Once the camshaft was all set, Josh helped me install the head re-using the same bolts. I did a lot of digging and found that the head bolts changed in 1980, the newer ones are polygonal (like a 12 pt socket) but mine are the old hexagonal ones (like a regular 6 pt) that are not Torque To Yield and look in great condition.
Next up, timing belt and inlet.
Took an age to find information on the torque setting for the timing belt tensioner bolt, in the end I went with the 33 ft lbs requirement that is used on the 944.
Once the exhaust was all connected up to the head again, it was ready for the inlet. Jake came out and helped clean up the inlet before we installed it. Need to have a good look round and check that everything that needs to be connected is in place while at the same time trying to avoid installing anything that will be in the way later. Then we can move on to the fuel injection system.
Started putting the fuel injection back on but dropped a bloody copper washer down the back of the head that didn’t make it to the floor and another slid behind the washer fluid tank! Replaced with fibre washers and finally got the two lines connected at the back of the head. After connecting the line at the back of the intake I noticed a crack in one of the elbows on a diaphragm in the vacuum system. Need to replace that obviously, wondered if that might have been why it wasn’t getting boost sometimes? Surprised I didn’t see anything with the smoke machine.
Struggled to find an elbow so I made one up out of a plastic elbow with rubber hose in each end, it should be alright for now. Then I could finish off installing the fuel injection and vacuum system and put back the alternator and air box. Everything went fairly smoothly, had to repair a couple of broken wires, but I could not get it started – it was firing but would not run. After digging around I found that I had forgotten to tighten the injectors!! Now it is running nice but it is smoking like crazy and it stinks of coolant.
Last night I had a look round for external leaks and couldn’t see anything so I took off the valve cover and re-torqued the head bolts. They were on the low side of the tolerance but in range, tightened them to the cold setting of 86 ft lbs. Will fire it up again this weekend and see how it goes.
Just before the weekend my wife let the truck run low on coolant and overheat! Obviously it’s up to me to keep an eye on the coolant level and in this case I failed. Even the odometer beeped and flashed up “Check Gauges” to tell her to look at the temperature. Anyway after I topped up the coolant I couldn’t find any signs of a leak and started getting concerned about a blown head gasket. My buddy in the UK suggested I get a block check kit and with the 924T blowing smoke as well I figured it would be a good investment. Unfortunately the guy at Car Quest had never heard of such a gadget??? Sometimes I wonder if people struggle with the accent and then just play dumb. The guy at Napa knew exactly what I was after but had to order one, finally Canadian Tire came through and with a good price.
This gadget consists of a tube, a rubber bulb and some fluid. You put some of the blue fluid in the tube, place the tube over the radiator or overflow tank cap with the engine warm and running and then draw air through the fluid by squeezing and releasing the bulb – if there are any combustion gases in the air, the fluid turns green.
Good news everyone! Checked the F150 and the 924T and the fluid stayed blue the whole time – see pic.
The trim around the heater controls is cracked and half of the tabs that hold it in place have snapped off. My dad and I spent a good bit of time searching for a replacement with no joy so I drew up a 3D model in Onshape with the intention of getting one 3D printed. The first attempt did not work well as there was a recessed face that required supports that left the face rough looking, so now I have split it into two parts that should print nicely ready for gluing. Just need to figure out a good way to get the markings on.
Got under the car today to swap out the oil in the tranny with the new Lucas synthetic stuff I picked up yesterday. The stuff in the tranny has been there at least while it sat for the last 18 years and who knows how long before that, check out the state of it.
After that I decided to clean, oil and fix up the throttle valves that have been sticking. After a bit of digging I traced the problem to an injection line that was running too close to the throttle mechanism on the underside of the intake. A bit of bending and tweaking and the throttle is now silky smooth, really looking forward to trying it out.
Finally got the Porsche running and insured with classic car insurance through Hagerty. Went out for a run and it was stuttering and hesitating under load/boost. I remembered that last time it was doing that, it turned out to be the in-line fuel filter at the back getting clogged, so I checked it and found that the element had broken off allowing crap to go straight through into the pump. After installing a new one … exactly the same. Then I changed the metallic filter under the hood … exactly the same. Then as I was contemplating how to check the fuel system and injectors for blockages, my lad came out after a bit of googling and told me it was spark plugs. I didn’t think so but figured that they are easy to check so pulled them out … first one was black, other three were a nice tan colour. Swapped them out for new ones and now it runs great!! I know it’s lighter than the RX-8 or GTI but it pulls real strong now and feels like more than 150HP to me. Well done Josh, I’m happy!
Ahhhh the joys of owning an old sports car! Driving along yesterday and it felt like it wasn’t pulling as strong above 4000rpm, opened it to 5500rpm and it felt like something kind of blew or something and then it was running like one cylinder wasn’t firing. Managed to crawl home and check the spark plugs with an in-line timing light, all looked good. Took them out and the one in #2 cylinder was black and wet while the others were brown. Installed new Champion copper plugs and it was exactly the same but when I took them out after 5 mins running, the two outer plugs were white and the two inner plugs were tanned – see pic.
Cleaned up the old Platinum plugs and put them back in, then took out the injectors and cleaned them with WD40. Now I can’t even get it started!!
I think it must be something to do with fuel, guess I’ll have to figure out a way to test the injectors and/or fuel pressure.
Quite a bit gone on over the last few days, better get this updated. I found a huge tear in the lower vacuum hose going into the airbox from the EGR cannister behind the DS front wheel. Replaced that but it was still the same, ugh. I notced that the #1 spark plug gap was getting closed when the engine rotated, WTF? So I put the Champions back in, checked that they were ok and finally got it running. iI was running rough so we took it out to try and blast it out but heard something clatter and bang on the PS of the engine and down that side … and broke down. Managed to get it going on 2 or 3 cylinders and crawl home. When we got back Josh saw some oil on the drive that we traced to the elbow on the turbo waste-gate. Note: I haven’t heard the waste-gate going off before (but then I haven’t it on the GTI either), and the boost gauge has also reguarly been pinned at max. While checking the turbo elbow I found a nasty tear in the timing belt! Both the marks still lined up so nothing slipped at least, maybe that had something to do with the noise we heard ?? On with draining the coolant and and removing stuff to get to the timing belt. That’s it for now, more later on broken injectors and turbo elbows …
Got a new timing belt from CarQuest, and got that installed ok. Took out the injectors and read up on how to back-flush them by pulling out the pin and holding it open with some wire looped round it. I got one done but it was very fiddly and difficult to do by myself, was going to go and get one of the kids to help but had one last go … and the pin cocked over and came out – that injector is now toast! Ordered new ones from AutoPartsWay along with an air filter, amazingly it all came the next day … and the parts were all wrong. The injectors were short and didn’t have a threaded section to go into the holder, and the air filter was a different shape – now we’ll see how easy returns to an on-line store are – I have to wait up to 72 hours for a response from a rep, that’s not a good start, I hope they have the right injectors for me.
Started looking at how to get at the turbo elbow, apparently either the turbo or the water pump need to come off. At first I thought it would be easier to remove the water pump but since I have concerns over the waste-gate I might as well take the turbo off. I started following the workshop manual and taking my time, about ready to take off the muffler and then disconnect waste gate cable.
Waste gate cable??? It’s a vacuum line from the rear of the charge tube – intake I’ve been calling it but it’s the part that goes from the turbo exit to the intake. Got the vacuum line off ok but all the nuts holding the J-pipe to the waste gate sheared off and the J-pipe just flat out refuses to come off. This J-pipe also prevents the main exhaust from sliding back far enough to clear the studs on the back of the turbo. OK I’ll remove the pipe on the back of the waste gate and slide the waste gate and J-pipe out together … one nut on the back sheared, another rounded and access to the remaining two is limited. Also the waste gate mounting bracket has snapped in half and I noticed that the stud sticking out of the PS engine mount has gone??
So that’s where I’m stuck right now, sprayed a load of penetrating lube around the joint, trying to think of the best way to proceed.
Decided to take Bernie’s advice and just cut the J-pipe, can always weld it back up again. So I managed to get the waste-gate and exhaust off and started looking at repairing the waste-gate studs. Then I dismantled the waste-gate actuator on top and found that the spring seems to have vibrated into the side-walls and gouged out grooves and the rubber boot has a tear in it – in summary, the whole waste-gate is toast. I imagine it will be tough to find another 924T waste-gate, in which case I’ll find one off something else with the same/similar boost setting (0.8 bar). Still need to get the turbo out to replace the cracked elbow.
Crap, I’m not updating this post anywhere near as much as I thought I would! Managed to get the turbo out but the real struggle was getting it back in. Found a rubber S bend pipe at CarQuest with fairly tight elbows and it’s about the right size, a tad loose but should be fine with hose clamps and my neighbour very kindly donated a spare 38mm wastegate he had lying around. This Turbonetix wastegate has 2 bolt flanges (but one was missing) but the original Porsche one had 4 bolt flanges. I welded the one flange onto the wastegate exit pipe but it looks like I might need to add a small piece to the inlet pipe to maintain the same alignment. Also the air line connection on the old wastegate was a banjo bolt but the new one has a hose barb so I thought about making an adapter but I’ll probably just clean up and cut the old connector off and clamp a rubber hose on.
Oh did I mention I got new injectors from RockAuto? Got the wrong ones at first, the ones they had listed for my car didn’t match what was in there, finally tracked them down to an older 911 part?? While putting the new injectors in I found that the threads were trashed in one of the injector sockets that the injectors thread into. I moved it to the front cylinder for easiest access and figured I might as well try it while I try to find a replacement. On the top of the engine there’s only the pressure tube that goes from the turbo outlet to the intake to put back on now, need some RTV sealant for that or some sort of gasket, and the wire needs putting back onto the distributor very carefully – I must see if I can find a used one since mine is broken and the wires are hanging on by the solder.
There’s also an exhaust bracket missing at the front of the cat (thinking about it, I don’t think I ever had it) and I can’t find the rubber mounts that I used for the muffler hanger. I found the fuel filter with the original clamp in the wastegate box so I think I’ll swap that back in for the new one that I installed because I couldn’t find the old one!
Made an exhaust hanger and cut some gaskets from some Grafoil paper, not sure how good they’re going to be though, and found the rubber mounts for the muffler … in place on the muffler mount on the car! The fuel filter is in using the original clamp, the pressure tube is installed with another DIY gasket and the distributor wire is connected. Offered up the exhaust hanger and it looks pretty much spot on so I cut and painted it and then put the starter back in. Came up with a design for a 4 to 2 bolt flange adapter for the wastegate and a banjo to barb hose adapter for the air line that comes from the pressure tube and gave them to Rick along with a selection of parts as he kindly offered to make them for me in his workshop. Once they come back I only need to weld the J pipe back together and install the exhaust, I really hope it runs well.
Picked up the parts from Rick, welded up the J pipe, found that I had welded the flange on the wastegate exit pipe 90° off so had to cut that off again and re-weld then installed the exhaust and wastegate. The dang thing wouldn’t start! We did manage to get it running yesterday but it wasn’t right. After the start attempts we found some smoke coming out of the valve cover and oil weeping out of the head gasket just above the turbo. At first I thought the head gasket must have failed but now I suspect that the exhaust is blocked. I checked that the turbo was spinning freely so maybe the cat is clogged, I’ll remove the mid-pipe and cat later and try to think of a way to test it.
Removed the mid pipe and tried blowing compressed air through it to test it but could only tell that some air was getting through, not whether the quantity of air was good. Got the borescope out, couldn’t see much of anything but could see that there was a direct line of sight out of the pipe at one location. I had assumed that there was a catalytic converter in the pipe that would block visibility but decided to shine a flashlight in and take a look, there is nothing there, I could see right through the pipe to the bend at the inlet! So no blockage there, I re-installed the exhaust and tried again. It fired up on the second attempt and actually idled a little this time but there is no power and a slow response when you open the throttle. Then it was late and I had to get cleaned up so I called it a night, probably compression test next.
Compression test results (psi), 0, 3, 0, 80!! Double checked a couple of cylinders to confirm that the gauge was working properly then took the head off to find that the ‘new’ head gasket was trashed!!! Not sure what caused that in such a short time, according to the Victor Reinze booklet it could be a dirty mating surface or incorrect clamping load. Checked the head bolt holes and found a bit of debris in one, the bolt could have been bottoming out on that one but otherwise they seemed ok. Bolts look fine but I will offer them up to the bolt holes again and ensure they go in far enough to clamp on the head. Cleaned up the block and head surfaces and removed the carbon build up where the gasket was broken, then ordered a new gasket from RockAuto.
The new ITM head gasket arrived so I checked it over and inserted the head bolts into the block to make sure that they threaded in far enough to apply a load to the head. Josh was up relatively early on Saturday so I asked him to give me a hand putting the head back on, told him it should only take about 10 minutes, it ended up taking about 2 hours!! There are 5 wires around the back of the head that are hard to get to once the head is in place, a couple of times these wires fell off and/or broke during installation. Then we got the head in place and then dropped a hose clamp, when looking under the car to find it, we found the exhaust gasket lying on the floor – couldn’t slot it back in so the head had to come off again! I had some similar issues with the intake and a vacuum line right at the back underneath.
By the time we had been to CT to pick up some more little electrical connectors and fixed up some more broken wires, it was almost 4pm on Sunday. We put some coolant back in and started it before Josh went to work, it started up fine but smoked a bit from the back of the engine bay near the blower motor. Jake helped me move the trailer and back it out so then we went for a little test drive to get gas and power wash the dust off. When we stopped at some lights the temperature gauge was bouncing around the red mark but as soon as we pulled away it immediately dropped to half and sat there nice and steady.
When Josh got back from work he was showing his buddies the car and he noticed that one of the wires from round the back of the head was disconnected and the wiring loom was touching the exhaust manifold. I got the borescope out and managed to re-connect the wire and check the others and when I checked the coolant, there was a good bit of pressure built up in there so that’s a good sign. The Porsche manual says that the head bolts should be torqued to 72 ft lbs and then after 1000 miles they should be re-torqued to 86 ft lbs, Dave J suggests that the head bolts should be re-torqued after a single heat cycle of the engine. With the potential temperature issue and the premature failure of the last gasket, I decided to follow Dave’s suggestion and torqued up the head bolts to the higher setting. Noticed that the low oil pressure light came on at idle a few times so tonight I’ll check the oil level and the headlights are aimed too low so I’ll look at that and hopefully get another test drive in.
Fixed the small fuel leak that was coming from the outlet plug at the bottom of the gas tank.
The boost seems to be dropping off a lot when it warms up. Replaced a leaking elbow that goes to a diaphragm in the vacuum system and installed a gasket between the J pipe and the exhaust manifold, seems to have helped but it still sits at 0.7 bar (the gauge says 7 bar but that is over 100 psi so that’s not right) at idle just after starting and then drops to 0.2 or 0.3 at warm idle.
The rear rotors have high spots probably due to sitting for 18 months with the parking brake on, that are causing bad pulses when braking, they need replacing.
The seats are a little low, I will look into making new seat brackets to lift them an inch or two.
Finally tracked the coolant leak to the hose that goes from the head to the heater core in the firewall, it was torn underneath. A new one is almost $60 plus tax and has to be ordered from Germany, I’m wondering if I can make something up but the diameter is about 5/8″ on one end and 1″ on the other and the bends are very long and tight.
Well that was dumb, talking to Dave at work, I realized that the boost gauge I was looking at that says 7 bar, is actually oil pressure!! So there doesn’t seem to be any boost issues right now but I could do with getting a boost gauge to see where it’s at.
I cut the torn end off the coolant hose that was leaking and was able to push it onto the boss further, I’ll see about ordering a new one over winter.
Thought I had finally stopped the leaks but then found a few fresh drops of oil on the driver’s side near the oil drain plug, but not coming from there. I’ll have a look tonight and try to identify the source.
Looks like oil has been leaking out of the dipstick where it goes into the block. I think the dipstick tube got bent a little (probably during intake removal/installation) and the end of the tube got deformed a little. I couldn’t see an O ring but I couldn’t find one in the parts catalogue so I put some high temp sealant around the tube and re-installed it.
I noticed some oil seems to have leaked from the valve cover and run down right on to the little land on the block where the head gasket was leaking before. Had a mild panic when I first saw it but I nipped down the valve cover nuts and will see if that seals it.
At the weekend I made up and installed new seat brackets to lift the seats by about 1.25″, it makes a huge difference to the driving experience. Also put some electrical tape over the speaker wires that have been soldered on to the connector on the seat to prevent them from shorting. Running nicer now …
Related articlesIntermittent power lossFuel pump removal August 2015I finally convinced myself to sell the Fiero and focus on the 924 Turbo but I foolishly didn’t put the money in the bank and put the envelope on my dresser instead. I was struggling to find seat sliders for the 924 and […]


The head gasket failed!! On the way home from work it was boosting intermittently again. At an opportunity to open it up a bit, it boosted nice for a while before suddenly BLAMO – a big cloud of white smoke. Had to get towed home – must join CAA again since Fred’s Towing stung me $130 to tow me less than 5K!!
Removed the head and sure enough, the gasket was toast. Also there were a couple of gouges in the gasket face of the head, Dave J says that this is probably the cause of the head gasket failing – will have to get it skimmed.
Found some marks on the cylinder walls that look like scoring but on closer inspection, I couldn’t feel anything to the touch and could not find any signs of debris (there’s a bit of oil in the pic that looks like debris) so I think they will be fine as they are.
You can also see valve marks in the top of the piston, must have happened some time in the past – my timing belt was in tact.
Had a good look at the camshaft and followers and found that they were badly worn. Took everything over to the fantastic Beatty and Woods in Mississauga who suggested replacing the camshaft and followers rather than re-grinding. The did a great job of skimming the head and while they had it, they did a leak check on the valves that came in within tolerance. Also picked up a head gasket set from Precision Auto, it’s for a NA 924 but the parts diagram gives the same part number for the Turbo.
Struggled to find exhaust studs; CarQuest came through with some in the end for under a buck each – nice.
Found a used camshaft in UK at porsche924.co.uk, only 8000 miles on it. No followers but I contacted the guy and he had a spare set that he agreed to sell me with the camshaft. Got a great deal with reasonable shipping and the guy did a fantastic job of packing it all so it arrived safe. Had to do a bit of fiddling around to get the clearances in and a couple of valves are close to the limits of adjustment.
Once the camshaft was all set, Josh helped me install the head re-using the same bolts. I did a lot of digging and found that the head bolts changed in 1980, the newer ones are polygonal (like a 12 pt socket) but mine are the old hexagonal ones (like a regular 6 pt) that are not Torque To Yield and look in great condition.
Next up, timing belt and inlet.
Took an age to find information on the torque setting for the timing belt tensioner bolt, in the end I went with the 33 ft lbs requirement that is used on the 944.
Once the exhaust was all connected up to the head again, it was ready for the inlet. Jake came out and helped clean up the inlet before we installed it. Need to have a good look round and check that everything that needs to be connected is in place while at the same time trying to avoid installing anything that will be in the way later. Then we can move on to the fuel injection system.
Started putting the fuel injection back on but dropped a bloody copper washer down the back of the head that didn’t make it to the floor and another slid behind the washer fluid tank! Replaced with fibre washers and finally got the two lines connected at the back of the head. After connecting the line at the back of the intake I noticed a crack in one of the elbows on a diaphragm in the vacuum system. Need to replace that obviously, wondered if that might have been why it wasn’t getting boost sometimes? Surprised I didn’t see anything with the smoke machine.
Struggled to find an elbow so I made one up out of a plastic elbow with rubber hose in each end, it should be alright for now. Then I could finish off installing the fuel injection and vacuum system and put back the alternator and air box. Everything went fairly smoothly, had to repair a couple of broken wires, but I could not get it started – it was firing but would not run. After digging around I found that I had forgotten to tighten the injectors!! Now it is running nice but it is smoking like crazy and it stinks of coolant.
Last night I had a look round for external leaks and couldn’t see anything so I took off the valve cover and re-torqued the head bolts. They were on the low side of the tolerance but in range, tightened them to the cold setting of 86 ft lbs. Will fire it up again this weekend and see how it goes.
Just before the weekend my wife let the truck run low on coolant and overheat! Obviously it’s up to me to keep an eye on the coolant level and in this case I failed. Even the odometer beeped and flashed up “Check Gauges” to tell her to look at the temperature. Anyway after I topped up the coolant I couldn’t find any signs of a leak and started getting concerned about a blown head gasket. My buddy in the UK suggested I get a block check kit and with the 924T blowing smoke as well I figured it would be a good investment. Unfortunately the guy at Car Quest had never heard of such a gadget??? Sometimes I wonder if people struggle with the accent and then just play dumb. The guy at Napa knew exactly what I was after but had to order one, finally Canadian Tire came through and with a good price.
This gadget consists of a tube, a rubber bulb and some fluid. You put some of the blue fluid in the tube, place the tube over the radiator or overflow tank cap with the engine warm and running and then draw air through the fluid by squeezing and releasing the bulb – if there are any combustion gases in the air, the fluid turns green.
Good news everyone! Checked the F150 and the 924T and the fluid stayed blue the whole time – see pic.
The trim around the heater controls is cracked and half of the tabs that hold it in place have snapped off. My dad and I spent a good bit of time searching for a replacement with no joy so I drew up a 3D model in Onshape with the intention of getting one 3D printed. The first attempt did not work well as there was a recessed face that required supports that left the face rough looking, so now I have split it into two parts that should print nicely ready for gluing. Just need to figure out a good way to get the markings on.
Got under the car today to swap out the oil in the tranny with the new Lucas synthetic stuff I picked up yesterday. The stuff in the tranny has been there at least while it sat for the last 18 years and who knows how long before that, check out the state of it.
After that I decided to clean, oil and fix up the throttle valves that have been sticking. After a bit of digging I traced the problem to an injection line that was running too close to the throttle mechanism on the underside of the intake. A bit of bending and tweaking and the throttle is now silky smooth, really looking forward to trying it out.
Finally got the Porsche running and insured with classic car insurance through Hagerty. Went out for a run and it was stuttering and hesitating under load/boost. I remembered that last time it was doing that, it turned out to be the in-line fuel filter at the back getting clogged, so I checked it and found that the element had broken off allowing crap to go straight through into the pump. After installing a new one … exactly the same. Then I changed the metallic filter under the hood … exactly the same. Then as I was contemplating how to check the fuel system and injectors for blockages, my lad came out after a bit of googling and told me it was spark plugs. I didn’t think so but figured that they are easy to check so pulled them out … first one was black, other three were a nice tan colour. Swapped them out for new ones and now it runs great!! I know it’s lighter than the RX-8 or GTI but it pulls real strong now and feels like more than 150HP to me. Well done Josh, I’m happy!
Ahhhh the joys of owning an old sports car! Driving along yesterday and it felt like it wasn’t pulling as strong above 4000rpm, opened it to 5500rpm and it felt like something kind of blew or something and then it was running like one cylinder wasn’t firing. Managed to crawl home and check the spark plugs with an in-line timing light, all looked good. Took them out and the one in #2 cylinder was black and wet while the others were brown. Installed new Champion copper plugs and it was exactly the same but when I took them out after 5 mins running, the two outer plugs were white and the two inner plugs were tanned – see pic.
Cleaned up the old Platinum plugs and put them back in, then took out the injectors and cleaned them with WD40. Now I can’t even get it started!!
I think it must be something to do with fuel, guess I’ll have to figure out a way to test the injectors and/or fuel pressure.
Quite a bit gone on over the last few days, better get this updated. I found a huge tear in the lower vacuum hose going into the airbox from the EGR cannister behind the DS front wheel. Replaced that but it was still the same, ugh. I notced that the #1 spark plug gap was getting closed when the engine rotated, WTF? So I put the Champions back in, checked that they were ok and finally got it running. iI was running rough so we took it out to try and blast it out but heard something clatter and bang on the PS of the engine and down that side … and broke down. Managed to get it going on 2 or 3 cylinders and crawl home. When we got back Josh saw some oil on the drive that we traced to the elbow on the turbo waste-gate. Note: I haven’t heard the waste-gate going off before (but then I haven’t it on the GTI either), and the boost gauge has also reguarly been pinned at max. While checking the turbo elbow I found a nasty tear in the timing belt! Both the marks still lined up so nothing slipped at least, maybe that had something to do with the noise we heard ?? On with draining the coolant and and removing stuff to get to the timing belt. That’s it for now, more later on broken injectors and turbo elbows …
Got a new timing belt from CarQuest, and got that installed ok. Took out the injectors and read up on how to back-flush them by pulling out the pin and holding it open with some wire looped round it. I got one done but it was very fiddly and difficult to do by myself, was going to go and get one of the kids to help but had one last go … and the pin cocked over and came out – that injector is now toast! Ordered new ones from AutoPartsWay along with an air filter, amazingly it all came the next day … and the parts were all wrong. The injectors were short and didn’t have a threaded section to go into the holder, and the air filter was a different shape – now we’ll see how easy returns to an on-line store are – I have to wait up to 72 hours for a response from a rep, that’s not a good start, I hope they have the right injectors for me.
Started looking at how to get at the turbo elbow, apparently either the turbo or the water pump need to come off. At first I thought it would be easier to remove the water pump but since I have concerns over the waste-gate I might as well take the turbo off. I started following the workshop manual and taking my time, about ready to take off the muffler and then disconnect waste gate cable.
Waste gate cable??? It’s a vacuum line from the rear of the charge tube – intake I’ve been calling it but it’s the part that goes from the turbo exit to the intake. Got the vacuum line off ok but all the nuts holding the J-pipe to the waste gate sheared off and the J-pipe just flat out refuses to come off. This J-pipe also prevents the main exhaust from sliding back far enough to clear the studs on the back of the turbo. OK I’ll remove the pipe on the back of the waste gate and slide the waste gate and J-pipe out together … one nut on the back sheared, another rounded and access to the remaining two is limited. Also the waste gate mounting bracket has snapped in half and I noticed that the stud sticking out of the PS engine mount has gone??
So that’s where I’m stuck right now, sprayed a load of penetrating lube around the joint, trying to think of the best way to proceed.
Decided to take Bernie’s advice and just cut the J-pipe, can always weld it back up again. So I managed to get the waste-gate and exhaust off and started looking at repairing the waste-gate studs. Then I dismantled the waste-gate actuator on top and found that the spring seems to have vibrated into the side-walls and gouged out grooves and the rubber boot has a tear in it – in summary, the whole waste-gate is toast. I imagine it will be tough to find another 924T waste-gate, in which case I’ll find one off something else with the same/similar boost setting (0.8 bar). Still need to get the turbo out to replace the cracked elbow.
Crap, I’m not updating this post anywhere near as much as I thought I would! Managed to get the turbo out but the real struggle was getting it back in. Found a rubber S bend pipe at CarQuest with fairly tight elbows and it’s about the right size, a tad loose but should be fine with hose clamps and my neighbour very kindly donated a spare 38mm wastegate he had lying around. This Turbonetix wastegate has 2 bolt flanges (but one was missing) but the original Porsche one had 4 bolt flanges. I welded the one flange onto the wastegate exit pipe but it looks like I might need to add a small piece to the inlet pipe to maintain the same alignment. Also the air line connection on the old wastegate was a banjo bolt but the new one has a hose barb so I thought about making an adapter but I’ll probably just clean up and cut the old connector off and clamp a rubber hose on.
Oh did I mention I got new injectors from RockAuto? Got the wrong ones at first, the ones they had listed for my car didn’t match what was in there, finally tracked them down to an older 911 part?? While putting the new injectors in I found that the threads were trashed in one of the injector sockets that the injectors thread into. I moved it to the front cylinder for easiest access and figured I might as well try it while I try to find a replacement. On the top of the engine there’s only the pressure tube that goes from the turbo outlet to the intake to put back on now, need some RTV sealant for that or some sort of gasket, and the wire needs putting back onto the distributor very carefully – I must see if I can find a used one since mine is broken and the wires are hanging on by the solder.
There’s also an exhaust bracket missing at the front of the cat (thinking about it, I don’t think I ever had it) and I can’t find the rubber mounts that I used for the muffler hanger. I found the fuel filter with the original clamp in the wastegate box so I think I’ll swap that back in for the new one that I installed because I couldn’t find the old one!
Made an exhaust hanger and cut some gaskets from some Grafoil paper, not sure how good they’re going to be though, and found the rubber mounts for the muffler … in place on the muffler mount on the car! The fuel filter is in using the original clamp, the pressure tube is installed with another DIY gasket and the distributor wire is connected. Offered up the exhaust hanger and it looks pretty much spot on so I cut and painted it and then put the starter back in. Came up with a design for a 4 to 2 bolt flange adapter for the wastegate and a banjo to barb hose adapter for the air line that comes from the pressure tube and gave them to Rick along with a selection of parts as he kindly offered to make them for me in his workshop. Once they come back I only need to weld the J pipe back together and install the exhaust, I really hope it runs well.
Picked up the parts from Rick, welded up the J pipe, found that I had welded the flange on the wastegate exit pipe 90° off so had to cut that off again and re-weld then installed the exhaust and wastegate. The dang thing wouldn’t start! We did manage to get it running yesterday but it wasn’t right. After the start attempts we found some smoke coming out of the valve cover and oil weeping out of the head gasket just above the turbo. At first I thought the head gasket must have failed but now I suspect that the exhaust is blocked. I checked that the turbo was spinning freely so maybe the cat is clogged, I’ll remove the mid-pipe and cat later and try to think of a way to test it.
Removed the mid pipe and tried blowing compressed air through it to test it but could only tell that some air was getting through, not whether the quantity of air was good. Got the borescope out, couldn’t see much of anything but could see that there was a direct line of sight out of the pipe at one location. I had assumed that there was a catalytic converter in the pipe that would block visibility but decided to shine a flashlight in and take a look, there is nothing there, I could see right through the pipe to the bend at the inlet! So no blockage there, I re-installed the exhaust and tried again. It fired up on the second attempt and actually idled a little this time but there is no power and a slow response when you open the throttle. Then it was late and I had to get cleaned up so I called it a night, probably compression test next.
Compression test results (psi), 0, 3, 0, 80!! Double checked a couple of cylinders to confirm that the gauge was working properly then took the head off to find that the ‘new’ head gasket was trashed!!! Not sure what caused that in such a short time, according to the Victor Reinze booklet it could be a dirty mating surface or incorrect clamping load. Checked the head bolt holes and found a bit of debris in one, the bolt could have been bottoming out on that one but otherwise they seemed ok. Bolts look fine but I will offer them up to the bolt holes again and ensure they go in far enough to clamp on the head. Cleaned up the block and head surfaces and removed the carbon build up where the gasket was broken, then ordered a new gasket from RockAuto.
The new ITM head gasket arrived so I checked it over and inserted the head bolts into the block to make sure that they threaded in far enough to apply a load to the head. Josh was up relatively early on Saturday so I asked him to give me a hand putting the head back on, told him it should only take about 10 minutes, it ended up taking about 2 hours!! There are 5 wires around the back of the head that are hard to get to once the head is in place, a couple of times these wires fell off and/or broke during installation. Then we got the head in place and then dropped a hose clamp, when looking under the car to find it, we found the exhaust gasket lying on the floor – couldn’t slot it back in so the head had to come off again! I had some similar issues with the intake and a vacuum line right at the back underneath.
By the time we had been to CT to pick up some more little electrical connectors and fixed up some more broken wires, it was almost 4pm on Sunday. We put some coolant back in and started it before Josh went to work, it started up fine but smoked a bit from the back of the engine bay near the blower motor. Jake helped me move the trailer and back it out so then we went for a little test drive to get gas and power wash the dust off. When we stopped at some lights the temperature gauge was bouncing around the red mark but as soon as we pulled away it immediately dropped to half and sat there nice and steady.
When Josh got back from work he was showing his buddies the car and he noticed that one of the wires from round the back of the head was disconnected and the wiring loom was touching the exhaust manifold. I got the borescope out and managed to re-connect the wire and check the others and when I checked the coolant, there was a good bit of pressure built up in there so that’s a good sign. The Porsche manual says that the head bolts should be torqued to 72 ft lbs and then after 1000 miles they should be re-torqued to 86 ft lbs, Dave J suggests that the head bolts should be re-torqued after a single heat cycle of the engine. With the potential temperature issue and the premature failure of the last gasket, I decided to follow Dave’s suggestion and torqued up the head bolts to the higher setting. Noticed that the low oil pressure light came on at idle a few times so tonight I’ll check the oil level and the headlights are aimed too low so I’ll look at that and hopefully get another test drive in.
Fixed the small fuel leak that was coming from the outlet plug at the bottom of the gas tank.
The boost seems to be dropping off a lot when it warms up. Replaced a leaking elbow that goes to a diaphragm in the vacuum system and installed a gasket between the J pipe and the exhaust manifold, seems to have helped but it still sits at 0.7 bar (the gauge says 7 bar but that is over 100 psi so that’s not right) at idle just after starting and then drops to 0.2 or 0.3 at warm idle.
The rear rotors have high spots probably due to sitting for 18 months with the parking brake on, that are causing bad pulses when braking, they need replacing.
The seats are a little low, I will look into making new seat brackets to lift them an inch or two.
Finally tracked the coolant leak to the hose that goes from the head to the heater core in the firewall, it was torn underneath. A new one is almost $60 plus tax and has to be ordered from Germany, I’m wondering if I can make something up but the diameter is about 5/8″ on one end and 1″ on the other and the bends are very long and tight.
Well that was dumb, talking to Dave at work, I realized that the boost gauge I was looking at that says 7 bar, is actually oil pressure!! So there doesn’t seem to be any boost issues right now but I could do with getting a boost gauge to see where it’s at.
I cut the torn end off the coolant hose that was leaking and was able to push it onto the boss further, I’ll see about ordering a new one over winter.
Thought I had finally stopped the leaks but then found a few fresh drops of oil on the driver’s side near the oil drain plug, but not coming from there. I’ll have a look tonight and try to identify the source.
Looks like oil has been leaking out of the dipstick where it goes into the block. I think the dipstick tube got bent a little (probably during intake removal/installation) and the end of the tube got deformed a little. I couldn’t see an O ring but I couldn’t find one in the parts catalogue so I put some high temp sealant around the tube and re-installed it.
I noticed some oil seems to have leaked from the valve cover and run down right on to the little land on the block where the head gasket was leaking before. Had a mild panic when I first saw it but I nipped down the valve cover nuts and will see if that seals it.
At the weekend I made up and installed new seat brackets to lift the seats by about 1.25″, it makes a huge difference to the driving experience. Also put some electrical tape over the speaker wires that have been soldered on to the connector on the seat to prevent them from shorting.
Running nicer now …