Replace The Sealed Lamp Units on a 1980 Porsche 924 Turbo
Difficulty: Simple
This guide is for the early versions that had the sealed headlamp units, later on I think they went to a separate bulb arrangement.
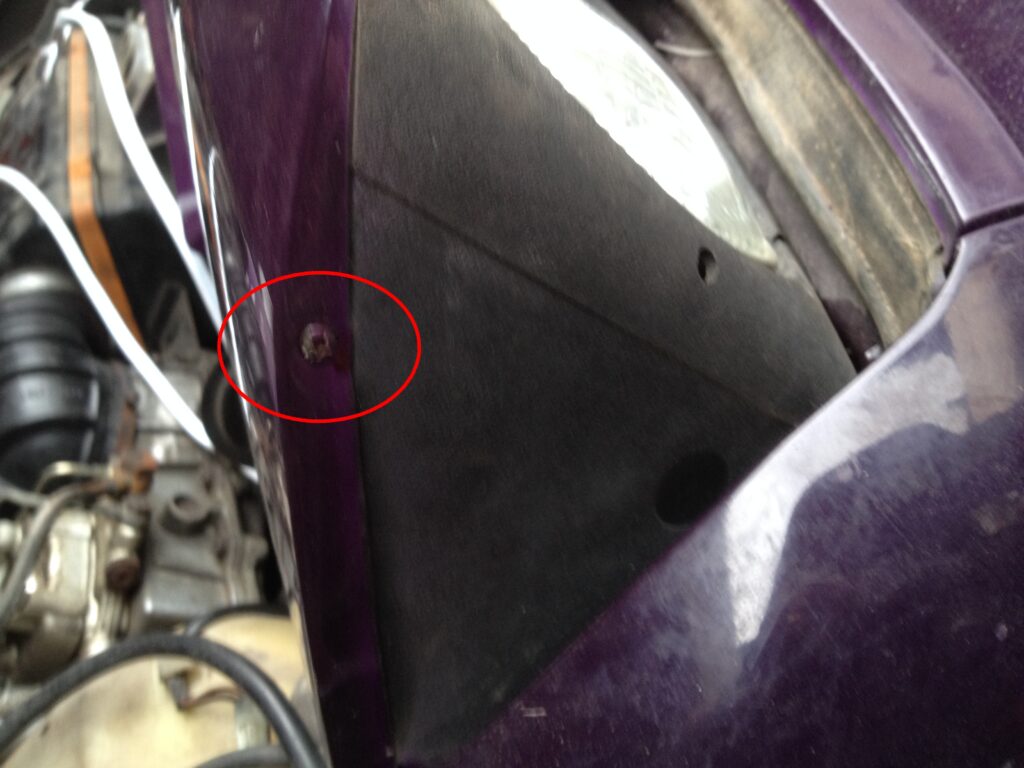
First of all we need to remove the pop up light covers, there are three screws holding them on, two on the sides and one at the back. If you have a ratchet screwdriver like this, you can remove the rear screw with the lights up, otherwise you will need to remove this screw first.


The lights will need to be popped up to remove the side screws, with the keys in and the ignition on, turn on the lights then remove the keys leaving the lights up. Once you have done that, the sidelights stay on so now is a good time to disconnect the battery, then remove the side screws.
Now carefully lift off the cover, they can be pretty tight so be careful and gently pry the sides of the cover open while lifting, it seemed easier to me to start at the back and work forwards.
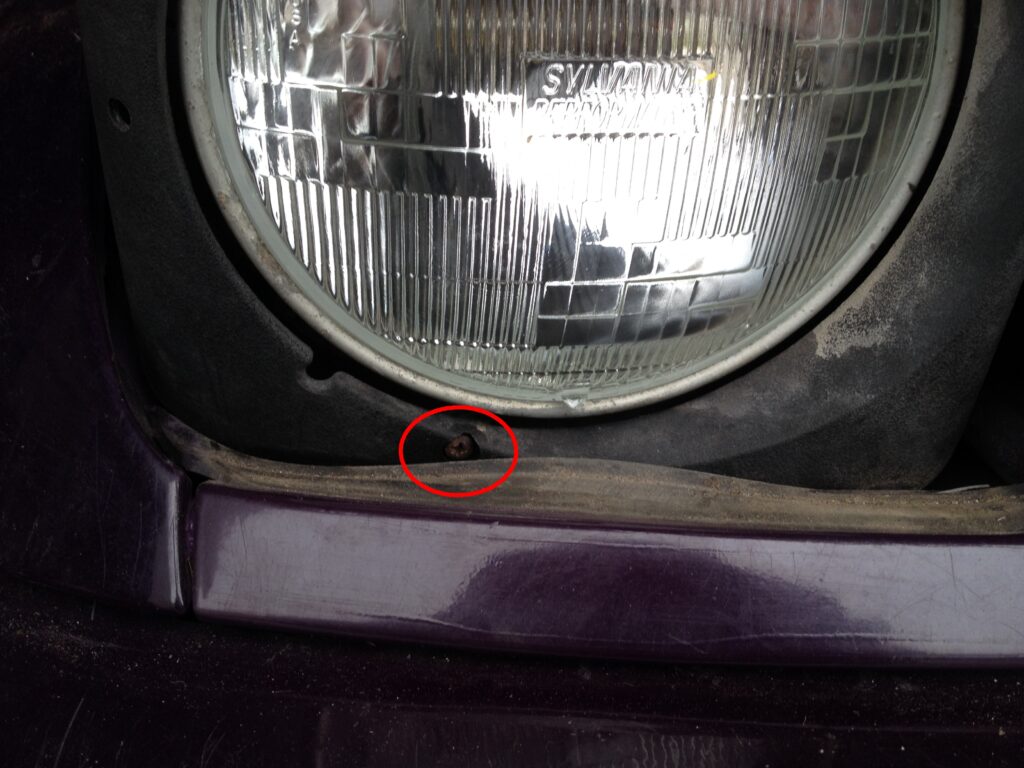
With the cover off, we need to undo the screw holding the plastic housing in place. Have a friend hold up the headlight to the maximum travel to allow easy access to this screw. Once it’s out, the plastic housing can be removed.

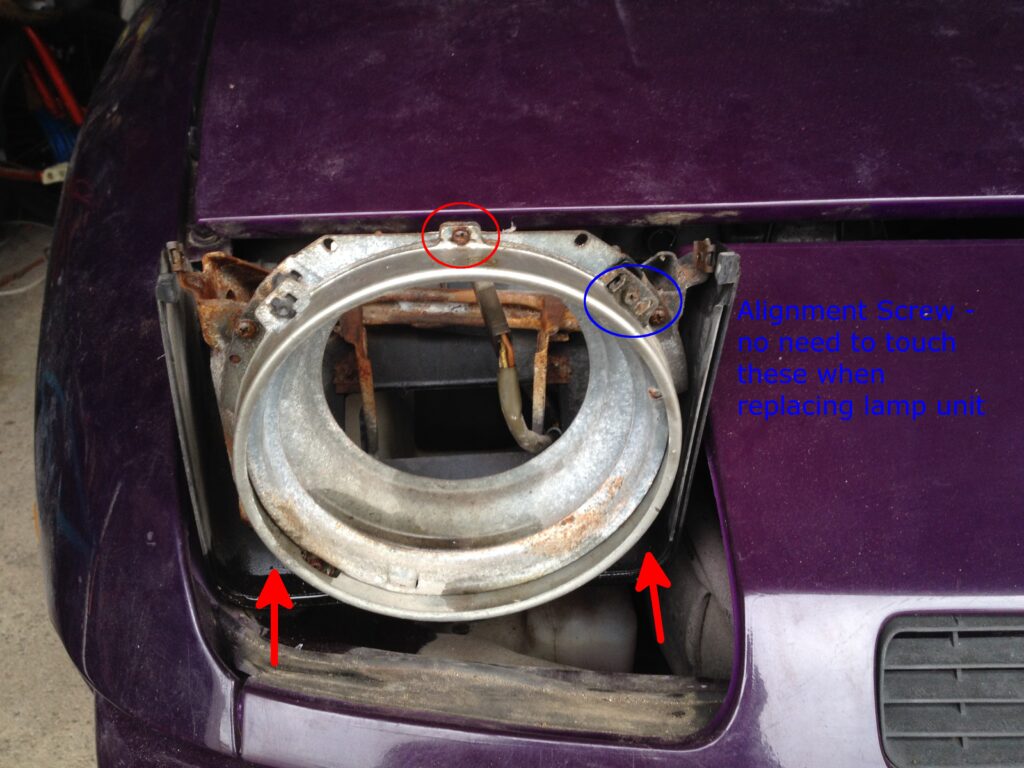
Remove the three way electrical connector from the back of the lamp, this can be a bit stiff and you don’t want to snap the blades off so just gently pry it on each side if required. There are three screws holding the lamp surround to the mount that comes off next. If there are no issues with headlight alignment, avoid touching the two alignment screws.
The sealed lamp unit is not shown in the pictures below, be ready to catch the lamp once these three screws are undone, there is nothing else holding it in place.


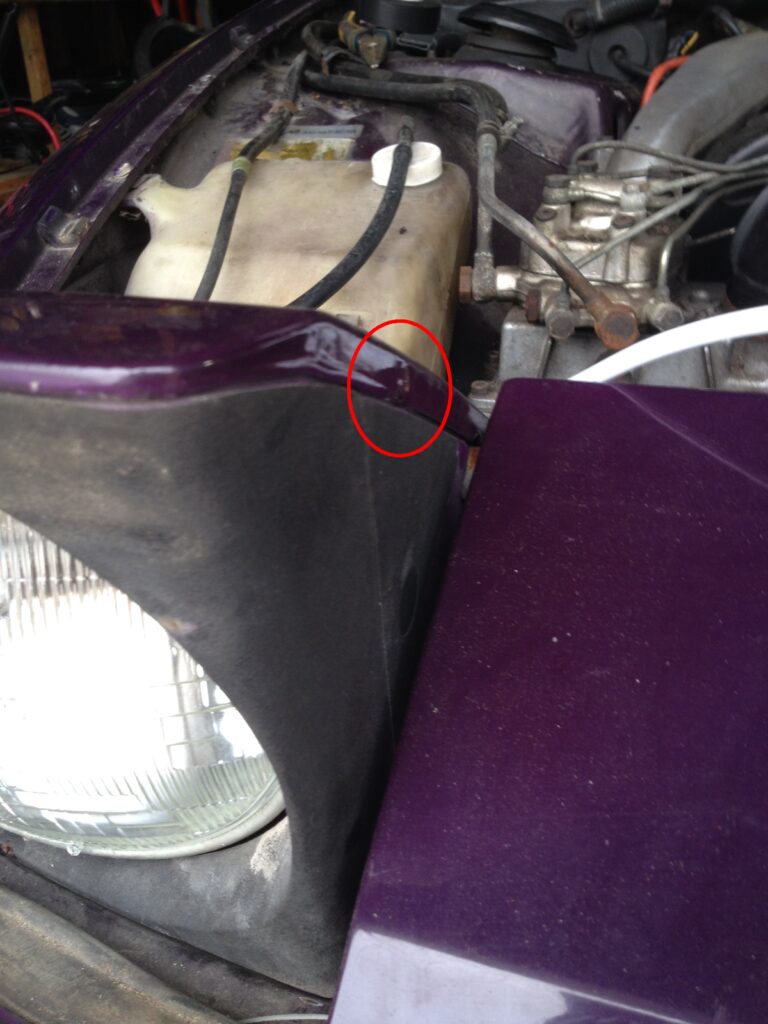
While the lamp unit is out of the way, take the time to inspect your lamp wiring for cracks or damage. Pay particular attention to where the wire is clamped to the headlight housing as this is where the wires get stressed when the headlight moves up and down. You can see that my wires had cracked here potentially shorting on the housing. It’s also worth taking the opportunity to clean up the ground screw and ensure that you have a good connection.


I’m going to pull the old “installation is the reverse of removal” here with the addition of recommending that when you’re re-installing the covers, make sure that the plastic housing is correctly aligned and this time, start at the front and work your way to the rear.

That’s it, replacement headlamps installed.