July 2008
Now the old power-train is out of the way, we’ll move swiftly on to mounting the new one, a Buick V6 3800 Supercharged Series II L67 engine out of a 1997 Pontiac Grand Prix GTP.
While the cradle was readily accessible I had a good look over it and found that it was overall in great shape with only one little rust hole about the size of a nickel.


This was cleaned up and repaired by welding a small piece of metal in place.
When it comes to mounting your engine and transmission, depending on what you’re installing, you might find some ready-made mounts available for purchase. Going that route is great and makes some decisions for you, but let’s have a look at making our own mounts.
Firstly, you’re highly likely to be using some lifting equipment to offer up your power train to the cradle so BE CAREFUL. It was during this stage that I was extremely lucky to avoid disaster with a removable link, so please review the safety precautions here and always remember – safety first.
Positioning
When aligning the power train on the cradle, you want to be able to support the engine and transmission in place over the cradle so that you can visualize, design, and take measurements for your mounts. I supported the cradle on a couple of saw horses and then used an engine hoist to hold the engine over the cradle. With the engine in place, the main mount bracket on the engine lines up very close to the stock engine mount on the cradle. I decided that I would use the old Fiero engine mount in this location which had the added benefit of being able to use the old one for aligning and mock-up. I then installed new mounts all round once everything was made up. A little modification to the mount platform on the cradle was required to accommodate the rubber mount, at this point it’s a good idea to sort out the vertical positioning of your power-train. I extended the original platform at the same level so that the mount would sit under the middle of the bracket on the engine. In the pictures below, the middle hole was the left hole of the original mount for the 4 cylinder engine, everything to the left was fabricated to hold the same rubber mount for the new engine.


You want to try to mount your power-train as low as possible in the cradle. For good handling, you want to be shooting for a low Centre of Gravity and since the power train has a significant weight, small changes can have a relatively large impact. On my installation, the vertical position was limited by the right side engine mount bracket fouling on a cradle beam.
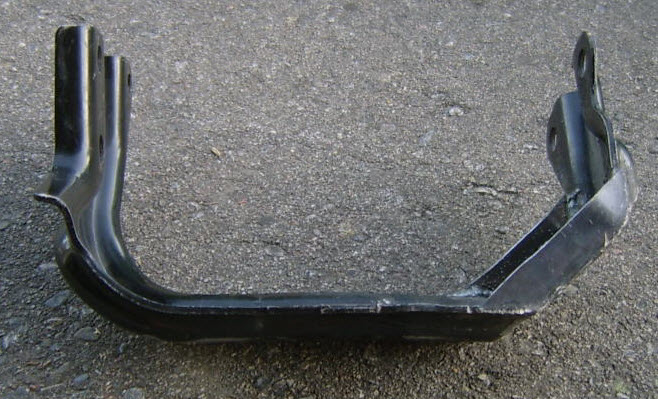
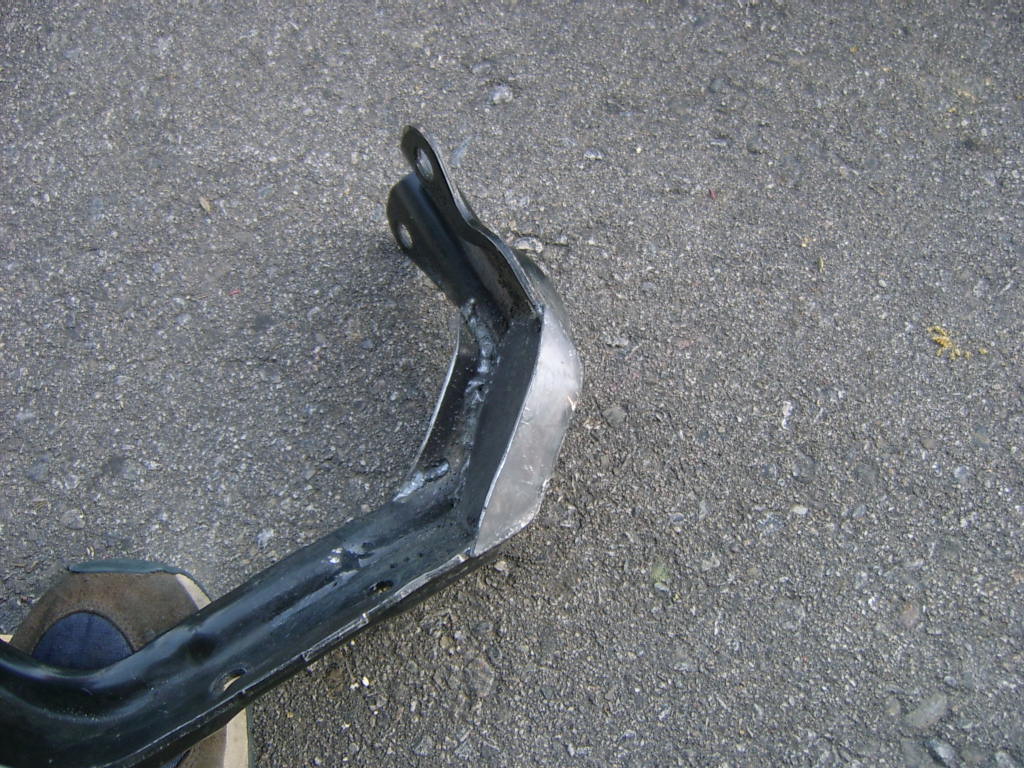
In order for the engine to sit on the engine mount I had made, I decided to modify the engine bracket since I wasn’t keen on modifying the structural beam of the cradle. I started by marking out how much of the corner had to go and then welding the two side pieces in place. Once they were set, I cut off the corner and welded a piece of plate in place. This meant that I didn’t have to worry about struggling to align the bracket when installing back on the engine.


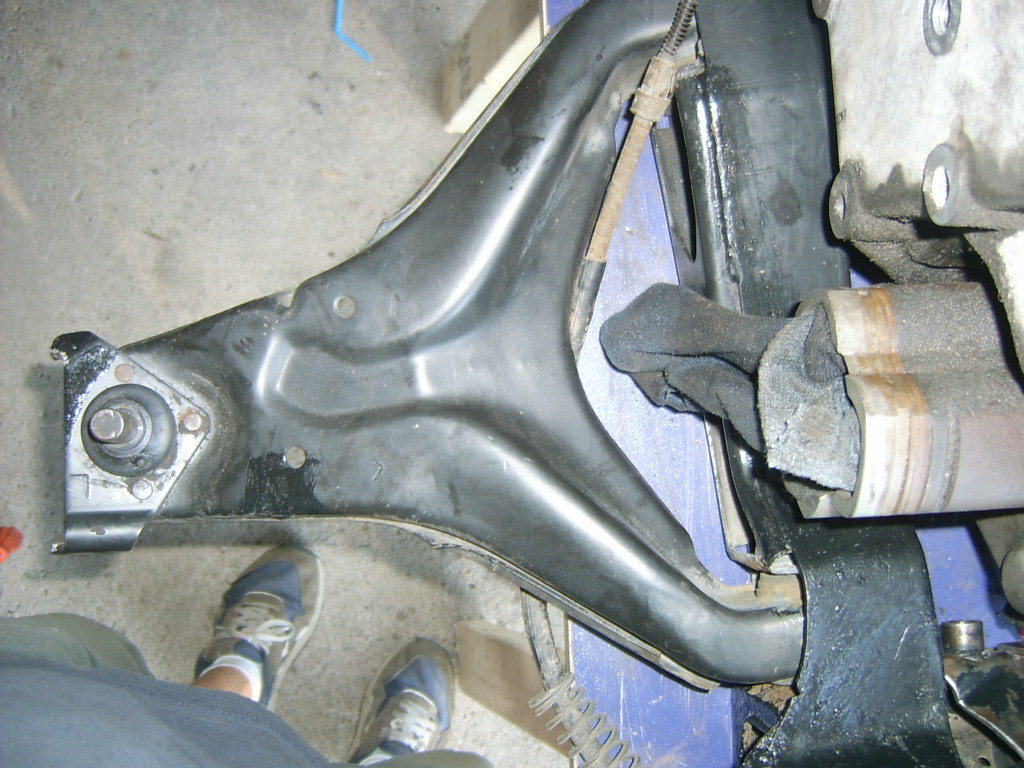
As it turned out, I couldn’t have gone much lower without risking the belt rubbing on the cradle. Don’t forget that you need to account for a bit of power train movement under load, bearing in mind the type of mounts you’re using (i.e. rubber, polyurethane, solid, etc). You can also see in the picture that there is a small clearance of about 1/2″ between the mount bracket and the cradle beam on my application.
With the vertical position of the power-train set as shown here, the trunk lid fouls the alternator and won’t close. Some people modify the trunk, there is a spar on the underside that actually hits the alternator, so you might gain enough room by cutting into the spar without going through the outer shell. I decided to move the alternator out the way – see the Relocate The Alternator article.
Once you have an idea of where the vertical position is going to be, you can then move onto the fore/aft positioning and tackle the angular alignments at the same time by aligning the drive axles with the rear suspension A arms.

Since the 4T65E-HD transmission that comes on the Grand Prix GTP uses drive axles that are fairly short and similar in length (as opposed to the stock, manual drive shafts), they are great for aligning the power-train. My transmission didn’t come with the axles but fortunately the tripots were left in place and were a huge help with alignment. By supporting the power-train over the cradle and resting it on the engine mount I just made above so that it is at operating height, I was able to eyeball the lines on the tripots against the lower ball joints so that it sits very close to square. Then you can measure up and design your mounts. I used the rubber base from the existing Fiero mount for the side transmission mount and then made up a bracket that attached to the transmission. If you’re using rubber mounts, don’t forget to allow for some compression due to the weight of the engine and tranny. This can be a bit of a frustrating stage, I ended up with more iterations than I would have liked but the final result was worth it.


The front transmission mount shown in the above right picture is solid other than a sheet of rubber underneath to provide a bit of give. It perhaps should have been a bit stiffer, but has held up fine so far and continues to be routinely monitored. As my buddy Rick pointed out, It might be better to break the mount rather than the transmission case.


I definitely wanted an upper dog-bone due to the large torque and found that I could use the stock Fiero location on the trunk wall that lined up pretty well with the mount that the alternator was attached to on the engine. The bracket on the engine side is positively located in two places to prevent the dog-bone from twisting upwards under compression load.
While aligning the engine, don’t do like I did and waste time worrying about axle lengths. When I crossed the axle bridge, I was surprised at how easy and relatively cheap it was to have axles made up by a local axle dealer, on top of that, your axle length can probably vary by a good inch or so without a high risk of popping out. Having said that, I have known a guy that blew out a stock axle on his Monte Carlo with the same 3800 series II engine tuned to about 400 HP while running very low tire pressure on a drag strip.
Cradle Mounts
While the cradle is out and you have easy access, it’s a good time to review the cradle mounts. There are three main options to consider, in order of increasing stiffness, the stock rubber mounts, polyurethane or aluminum versions. From a ‘power to the wheels’ perspective, it is better to go with the stiffest aluminum mounts but you also have to consider vibration, your power-train mounts and how much you mind feeling the vibration in the driver’s seat while idling at the lights. I have rubber engine mounts with aluminum cradle mounts and you can certainly notice the vibrations at idle but they’re not bad at all.
I pressed out the old mounts using a puller made from some threaded bar, some exhaust off cuts and a huge washer. Then I scraped out as much of the remaining rubber as I could with knives and scrapers, and finally burnt off the residue left behind.


The picture above on the left shows the cradle with the mount pressed out and scraped but with the residual rubber still to be cleaned up; the picture on the right shows a shiny, new set of aluminum cradle mounts. With everything cleaned up I simply pressed the mounts into the cradle using a DIY puller made from a threaded bar, a piece of thick plate to act as a washer, an offcut piece of exhaust pipe against the cradle, a large washer against the mount and a couple of nuts. That doesn’t sound right, I made a puller to press something? You get the idea, if not let me know and I’ll clarify it on here. The rear mounts simply sit on the cradle in a recess in the body.